Fresh kale breaks down quickly in the refrigerator, wilting and becoming bitter. Blanching is way to preserve kale for as long as 12 months at a time. It’s a simple process that's done with a pot of boiling water and a bowl of ice water. You can then store excess kale in the freezer so you have it readily available throughout the year.
Steps
steps
一:
Part 1 of 4:
Washing and Cutting the Kale

1
Soak the kale in water for 1 minute to loosen dirt and debris. Fill a bowl or your sink with lukewarm water. Submerge the kale in the water, swishing it around with your hand. Any dirt and debris should wash off quickly.
Remove any ties or bands before putting the kale in the water.

2
Rinse the leaves under running water to remove dirt and bugs. If you have fresh kale, you may notice some bugs attached to the leaves or stem. They can be hard to see but will come off under running water. While holding the kale under the water, run your fingers along the leaves and stem to knock off any remaining bugs or dirt.
The bugs are harmless, so you don’t have to throw away your kale if you spot them on it.
Advertisement

3
Fold kale leaves in half on a cutting board. Shake the kale out to remove excess water, then begin arranging the kale for cutting. The easiest way to do this is to handle 1 leaf at a time. You will notice a tough, thick stem on the bottom of the leaf. Fold the leaf so its halves are stacked on top of each other.
When done correctly, the stem will be exposed and easily accessible.

4
Cut the stem away from the leaves. Start at 1 end of the stem. Position your paring knife next to the stem, touching the kale leaves. Then, drag the knife along the stem, cutting through both leaves. Repeat this with the rest of your kale.
You should be able to sever the stem from both leaves at the same time this way.
The stems are tough, but they can be blanched separately and eaten.

5
Chop the leaves into smaller fragments. Stack 2 leaves on top of each other. Chop the leaves into sections a
bout 1.5 in (3.8 cm) wide. The exact size isn’t important, but try to keep the chunks the same size so they boil at the same rate.
If chopping 2 leaves at o
nce seems difficult, you can slice the leaves 1 at a time.
You can blanch the leaves whole after removing the stem. However, they may be too large to fit in a pot or storage container.

1
Fill a stockpot ¾ full with water. There is no exact amount of water you need, since it depends on how much kale you want to blanch at a time. For larger batches of kale, choose the biggest stockpot you have. The water in the pot needs to cover the kale completely.
A good rule of thumb is to use 1 US gal (3.8 L) per 1 lb (0.45 kg) of kale.
If you have a lot of kale, you can blanch it in multiple batches to ensure it all fits in the pot.

2
Boil the water on the stove. Turn the heat up high and wait for the water to bubble rapidly. When the water is at the right temperature, it won’t stop bubbling even if you stir it. This is called a rolling or roiling boil.
To reduce the wait time, cover the pot with a lid as it heats.

3
Add ice and water to a separate bowl. The ice bath is what you use to rapidly cool the kale. You will need a bowl large enough to submerge each batch of kale you boil. Fill the bowl halfway full with cold water, then add at least a dozen ice cubes to chill it.
To blanch kale successfully, the water needs to be kept cold. Avoid letting it sit out too long before you begin boiling the kale.
Some home cooks rinse the kale under cold water, but your kale will come out crisper and fresher by utilizing an ice bath.

4
Lay out a large towel on a flat surface. Spread a cloth kitchen towel out, making sure you have plenty of space for the kale. You may want to place a second towel over it or move the towel o
nto a baking tray to prevent water from leaking o
nto your counter.
You can also use paper towels. Double up the layers to ensure the water gets absorbed later.

1
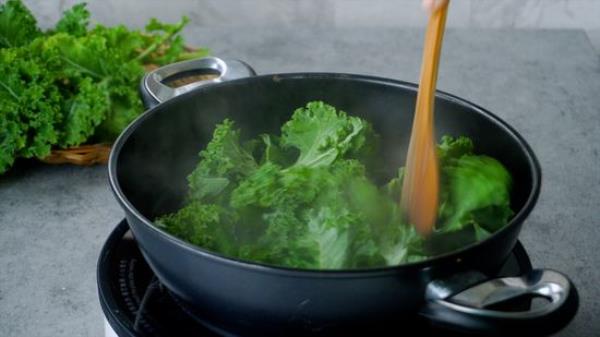
Drop handfuls of kale leaves into the boiling water. Take the lid off the stockpot if you have it on there. Dump as much kale into the water as possible. If your batch is larger than the pot, boil the leaves 2 to 3 handfuls at a time.
You do not have to replac
e the water after each batch of kale you boil.
2
Stir the leaves into the water before covering the pot. Use a wooden spoon to work all of the leaves into the water. Give them a quick stir to make sure they are all submerged. The water should co
ntinue to bubble despite this.
If you are not using a lid, the water may stop bubbling for as you stir. Wait for the water to return to a boil.
If the water stops bubbling, you may have too much kale in the pot.

3
Boil the kale for 2 minutes. Set your timer quickly, since the kale will start boiling as soon as it hits the water. It o
nly needs to be in the water for a short time. After its done, you can remove the kale and repeat the process with another batch.
If you have to wait for the water to bubble again, start the timer o
nce the water returns to a boil.

4
Chill the kale in an ice bath for 2 minutes. Take the kale out of the boiling water right away. You can use a slotted spoon to make this easier. Drop the kale into the icy water, submerging it. The cold water shocks the kale, preventing it from breaking down.
You can put another batch of kale in the stockpot while you wait. Remember to reset the timer.

5
Lay the kale on the towel in an even layer. Lift the kale out of the ice bath using your spoon. Then, position the kale on the towels. Make sure none of the leaves are overlapping, since you want the excess water to drain off of them.
You can place the kale in a salad spinner first. Spin it to remove some of the excess water before transferring the leaves to the paper towels.

6
Roll the towel to squeeze excess water out of the kale. Fold the towel carefully, keeping the kale inside of it. Press down on the folded towel to push more water out of the kale. The kale does not have to be completely dry before storage, but removing most of the water prevents it from getting soggy.
If you are unable to roll up the towel, get another paper towel and pat the leaves dry.
You can also squeeze the kale by hand to remove most of the excess water.

1
Move the kale to resealable, airtight containers. After you have finished blanching the kale, move it into a plastic bag or container. You can use zippered bags or lidded co
ntainers sold at many grocery stores. Squeeze the bag or co
ntainer to push out as much air as possible before sealing it.
If you plan on storing the kale in freezer, make sure you use freezer bags or co
ntainers to keep out air and ice crystals.

2
Store blanched kale up to 7 days in the refrigerator. Any kale you plan on using during the week does not need to be frozen. Make sure it is sealed properly in a plastic bag or container. It still eventually wilts, but it will last a little lo
nger than raw kale.
Label the bags or bins so you know when the kale was blanched.

3
Freeze kale if you can’t use it right away. Get a clean docu
ment sheet and spread the kale in a single, even layer over it. Pop the sheet into the freezer and wait 30 minutes. Afterwards, you can easily move the kale back into a resealable bag or bin for long-term freezer storage.
Frozen kale can last 8 to 12 months. Label the bags so you can keep track of how long they have been in the freezer.

4
Defrost frozen kale by leaving it on the counter for an hour. Take the co
ntainer out of the freezer, but don’t open it. You can then use the kale in a variety of recipes. Frozen kale can be added to any recipe that calls for lettuce or other greens. Try cooking it in olive oil, blending it into smoothies, or adding it to soups. It also works well as a part of sandwiches, pizza, or pasta dishes.
Thawed kale cooks within 1 or 2 minutes. Frozen kale will take slightly longer.


